How to Revive, Willa
Category
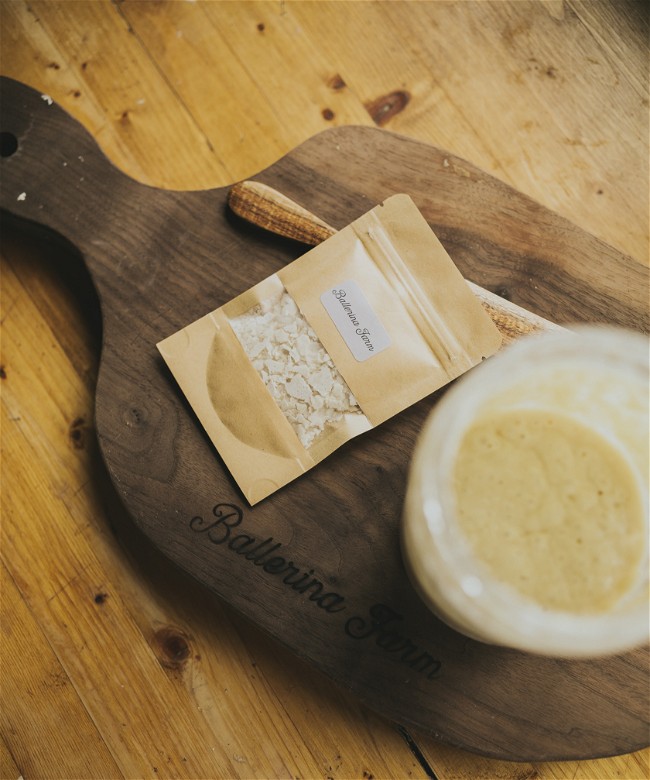
Willa
Tools needed before your begin:
Glass jar with a lid
Basic kitchen scale
Note: If on city water supply, consider using filtered or bottled water to exclude chlorine traces which can kill your starter.
Note: Wild yeast prefers warmer temperatures. The ideal kitchen temperature is around 76°F/24°C. If you’re dealing with cooler temperatures in your kitchen, your sourdough starter will take longer to develop.
Ingredients
- Dried sourdough starter
- Unbleached, white flour (all purpose or bread flour)
- Room temperature water
Directions
Day 1 – Morning:
Combine 5 grams dried sourdough starter in a glass jar. Add 50 grams of water. Stir until the freeze dried starter is completely submerged in the water.
Allow this mixture to sit for a few minutes to absorb the water.
Next, add 20 grams of flour and stir until well mixed.
Note: We’re using slightly more water than flour in this first feeding, a more hydrated starter allows for the yeast and bacteria to develop faster.
Cover with a lid and store at room temperature for 24 hours.
Day 2 – Morning:
Take out 10 grams of your starter mixture and add it to a clean jar. Next, combine the 10g of starter with 25g of flour, and 25g of water. Mix until well combined. Cover with a lid and store at room temperature for 24 hours.
Day 3 – Morning:
The mixture will probably look smooth and thin in texture. The mixture won’t look lively yet but you may notice a few bubbles.
Take out 10 grams of your starter mixture and add it to a clean jar. Next, combine it with 25g of flour, and 25g of water. Mix until well combined. Cover with a lid and store at room temperature for 24 hours.
Day 4– Morning:
There won’t be many changes from yesterday other than a few more bubbles.
Take out 10 grams of your starter mixture and add it to a clean jar. Next, combine it with 25g of flour, and 25g of water. Mix until well combined. Cover with a lid and store at room temperature for 24 hours.
Day 4 – Evening:
About 12 hours later, you’ll notice the starter has slightly grown. There will be many bubbles on the surface and sides of the jar.
Continue storing at room temperature.
Day 5– Morning:
You’ll notice your starter has bubbles and looks alive! There will be small and big bubbles not only on top, but under the surface of the mixture (by looking at the side of the glass jar). At this point you can start baking with the starter.
Now that your starter is revived, you can increase your feeding ratios to have enough starter to bake with.
Recipe Note
You should be feeding the starter that you removed and added to a new jar. You can put the 10 grams you are feeding in a new clean jar, then clean out the discard from the old jar. Each day switch back and forth from the jars until it is ready for daily feedings. Once the 10 grams of starter is in a new jar, you will feed it with 25 grams of flour and water.